
马科斯·恩里克·达席尔瓦
验证专家 in Engineering
Marcos has 17+ years in IT and development. 他的爱好包括REST架构、敏捷开发方法和JS.
Expertise
工作经验
12
Marcos has 17+ years in IT and development. 他的爱好包括REST架构、敏捷开发方法和JS.
12
In 第一篇文章 我们的REST API系列, 我们介绍了如何使用NPM从零开始创建后端, 添加依赖项,如 TypeScript, use the debug 内置于Node中的模块.js,构建一个Express.使用Winston灵活地记录运行时事件. 如果你已经习惯了这些概念,那就克隆吧 this,切换到 toptal-article-01 branch with git checkout,继续往下读.
如前所述,我们现在将详细介绍这些模块:
我们还要加上a very 不适合生产的基本数据库. (它的唯一目的是使本教程更容易理解, 这为我们下一篇文章深入探讨数据库连接以及与MongoDB和Mongoose的集成铺平了道路.)
在本教程的这一部分中,我们的数据库甚至不使用文件. 它将简单地将用户数据保存在一个数组中,这意味着只要我们退出Node,数据就会消失.js. It will support only the most basic create, read, update, and delete (CRUD)操作.
We are going to use two concepts here:
That one-letter difference between acronyms is essential: A DAO is responsible for connecting to a defined database and performing CRUD operations; a DTO is an object that holds the raw data that the DAO will send to—and receive from—the database.
换句话说, DTOs are objects that conform to data model types, and DAOs are the services that use them.
而dto可以变得更复杂——表示嵌套的数据库实体, for example—in this article, 单个DTO实例将对应于单个数据库行的特定操作.
使用dto让TypeScript对象符合我们的数据模型有助于保持架构的一致性, as we’ll see in the section on services below. 但有一个关键的警告:dto和TypeScript本身都没有承诺任何类型的自动用户输入验证, since that would have to occur at runtime. 当我们的代码在API的端点接收用户输入时,该输入可能:
?)TypeScript (and the JavaScript it gets transpiled to) won’t magically check this for us, so it is important to not forget these validations, especially when opening your API to the public. 包就像 ajv 可以帮助解决这个问题,但通常通过在库特定的模式对象中定义模型而不是原生TypeScript来工作. (在下一篇文章中讨论的猫鼬将在这个项目中扮演类似的角色.)
您可能会想,“同时使用dao和dto,而不是使用更简单的东西,真的更好吗??” Enterprise developer Gunther Popp 提供了一个答案; you’ll want to avoid DTOs in most smaller real-world Express.js/TypeScript项目,除非你可以合理地预期在中期扩展.
但是,即使您不打算在生产中使用它们, 在掌握TypeScript API架构的道路上,这个示例项目是一个有价值的机会. 这是练习利用TypeScript类型的好方法 在其他方面 并与dto一起工作,以了解在添加组件和模型时,它们与更基本的方法相比如何.
First we will define three DTOs for our user. Let’s create a folder called dto inside the users folder, and create a file there called create.user.dto.ts 载有下列内容:
export interface CreateUserDto {
    id: string;
    电子邮件:字符串;
    密码:字符串;
    firstName?: string;
    lastName?: string;
    permissionLevel?: number;
}
We’re saying that every time we create a user, 不管数据库是什么, 它应该有一个ID, password, and email, and optionally a first and last name. 这些需求可以根据给定项目的业务需求而变化.
For PUT 请求时,我们想要更新整个对象,所以我们的可选字段现在是必需的. In the same folder, create a file called put.user.dto.ts 使用下面的代码:
export interface PutUserDto {
    id: string;
    电子邮件:字符串;
    密码:字符串;
    firstName:字符串;
    姓:字符串;
    permissionLevel:数量;
}
For PATCH 请求时,我们可以使用 Partial 来自TypeScript的特性, 哪一种方法通过复制另一种类型并使其所有字段都是可选的来创建新类型. 这样,文件 patch.user.dto.ts need only contain the following code:
import { PutUserDto } from './put.user.dto';

export interface PatchUserDto extends Partial {}
Now, let’s create the in-memory temporary database. Let’s create a folder called daos inside the users folder, and add a file named users.dao.ts.
First, we want to import the DTOs that we created:
import { CreateUserDto } from '../dto/create.user.dto';
import { PatchUserDto } from '../dto/patch.user.dto';
import { PutUserDto } from '../dto/put.user.dto';
现在,为了处理我们的用户id,让我们添加shortid库(使用终端):
NPM I的缩写
npm i --save-dev @types/shortid
Back in users.dao.ts,我们将导入shortid:
import shortid from 'shortid';
import debug from 'debug';

Const日志:调试.IDebugger = debug('app:in-memory-dao');
We can now create a class called UsersDao, which will look like this:
类UsersDao {
    users: Array = [];

    构造函数(){
        log('Created new instance of UsersDao');
    }
}

export default 新的UsersDao ();
Using the singleton pattern, this class will always provide the same instance—and, critically, the same users array—when we import it in other files. 这是因为Node.Js缓存这个文件,无论它被导入到哪里,所有的导入都发生在启动时. That is, any file referring to users.dao.ts will be handed a reference to the same 新的UsersDao () that gets exported the first time Node.Js处理这个文件.
当我们在本文中进一步使用这个类时,我们将看到它的工作原理, and use this common TypeScript/Express.js pattern for most classes throughout the project.
注意:单例模式的一个经常被提及的缺点是很难为它们编写单元测试. In the case of many of our classes, this disadvantage won’t apply, 因为没有任何类成员变量需要重置. But for those where it would, 我们把它留给读者作为练习,让他们考虑使用 依赖注入.
现在我们将把基本CRUD操作作为函数添加到类中. The create function will look like this:
async addUser(user: CreateUserDto) {
    user.Id = shortid.generate();
    this.users.push(user);
    return user.id;
}
Read 将有两种口味,“读取所有资源”和“读取一个ID ?.” They’re coded like this:
async getUsers() {
    return this.users;
}

async getUserById(userId: string) {
    return this.users.find((user: { id: string }) => user.id === userId);
}
Likewise, update will mean either overwriting the complete object (as a PUT) or just parts of the object (as a PATCH):
async putUserById(userId: string, user: PutUserDto) {
    const objIndex = this.users.findIndex(
        (obj: { id: string }) => obj.id === userId
    );
    this.users.splice(objIndex, 1, user);
    返回“${用户.Id}通过put '更新;
}

async patchUserById(userId: string, user: PatchUserDto) {
    const objIndex = this.users.findIndex(
        (obj: { id: string }) => obj.id === userId
    );
    let currentUser = this.用户(objIndex);
    const allowedPatchFields = [
        'password',
        'firstName',
        'lastName',
        “permissionLevel”,
    ];
    for (let field of allowedPatchFields) {
        If (user中的字段){
            / / @ts-ignore
            currentUser[field] = user[field];
        }
    }
    this.users.splice(objIndex, 1, currentUser);
    返回“${用户.id}修补';
}
As mentioned earlier, despite our UserDto TypeScript不提供运行时类型检查. 这意味着:
putUserById () has a bug. 它将允许API消费者存储不属于DTO定义的模型的字段的值.patchUserById () 依赖于必须与模型保持同步的字段名的重复列表. 否则,它将不得不使用为该列表更新的对象. 这将意味着它将静默地忽略作为dto定义模型一部分的字段的值,这些字段之前没有为这个特定对象实例保存过.在下一篇文章中,我们将在数据库级别正确处理这两种场景.
最后一个操作,to delete a resource, will look like this:
async removeUserById(userId: string) {
    const objIndex = this.users.findIndex(
        (obj: { id: string }) => obj.id === userId
    );
    this.users.拼接(objIndex, 1);
    返回“${用户Id} removed`;
}
As a bonus, 知道创建用户的先决条件是验证用户电子邮件是否没有重复, let’s add a “get user by email” function now:
async getUserByEmail(email: string) {
    const objIndex = this.users.findIndex(
        (obj: { email: string }) => obj.Email === Email
    );
    let currentUser = this.用户(objIndex);
    if (currentUser) {
        返回currentUser;
    } else {
        return null;
    }
}
Note: In a real-world scenario, 您可能会使用预先存在的库连接到数据库, such as Mongoose or Sequelize,它将抽象您可能需要的所有基本操作. 因此,我们不深入讨论上面实现的函数的细节.
现在我们有了一个基本的内存DAO,我们可以创建一个调用CRUD函数的服务. 因为CRUD函数是连接到数据库的每个服务都需要的, 我们要创建一个 CRUD 接口,该接口包含我们每次要实现新服务时要实现的方法.
Nowadays, 我们使用的ide具有代码生成功能,可以添加我们正在实现的功能, 减少我们需要编写的重复代码的数量.
的快速示例 WebStorm IDE:
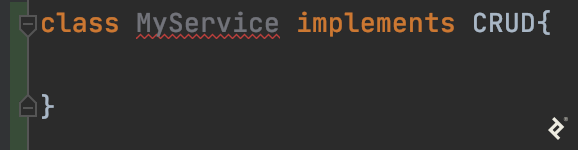
IDE突出显示MyService类名,并建议以下选项:

“实现所有成员”选项立即构建符合标准所需的函数 CRUD interface:

说了这么多,让我们首先创建TypeScript接口 CRUD. At our common folder, let’s create a folder called interfaces and add crud.interface.ts 下面是:
导出接口
    list: (limit: number, page: number) => Promise;
    create: (resource: any) => Promise;
    putById: (id: string, resource: any) => Promise;
    readById: (id: string) => Promise;
    deleteById: (id: string) => Promise;
    patchById: (id: string, resource: any) => Promise;
}
With that done, lets create a services 文件夹内的 users 文件夹并添加 users.service.ts 文件,包含:
导入UsersDao../daos/users.dao';
导入{CRUD}../../共同/ / crud接口.interface';
import { CreateUserDto } from '../dto/create.user.dto';
import { PutUserDto } from '../dto/put.user.dto';
import { PatchUserDto } from '../dto/patch.user.dto';

class UsersService implements CRUD {
    async create(resource: CreateUserDto) {
        返回UsersDao.addUser(资源);
    }

    async deleteById(id: string) {
        返回UsersDao.removeUserById (id);
    }

    async list(limit: number, page: number) {
        返回UsersDao.getUsers();
    }

    async patchById(id: string, resource: PatchUserDto) {
        返回UsersDao.patchUserById(id, resource);
    }

    async readById(id: string) {
        返回UsersDao.getUserById (id);
    }

    async putById(id: string, resource: PutUserDto) {
        返回UsersDao.putUserById(id, resource);
    }

    async getUserByEmail(email: string) {
        返回UsersDao.getUserByEmail(电子邮件);
    }
}

export default new UsersService();
Our first step here was to import our in-memory DAO, 接口依赖性, and the TypeScript type of each of our DTOs, 是时候付诸实施了 UsersService 作为服务单例,与我们在DAO中使用的模式相同.
All the CRUD functions now just call the respective functions of UsersDao. When it comes time to replace the DAO, 我们不必在项目的其他任何地方进行更改, 除了对调用DAO函数的文件进行了一些调整之外, 我们将在第3部分中看到.
For example, we won’t have to track down every call to list() and check its context before replacing it. 这就是有这层分离的好处, 以上面看到的少量初始样板文件为代价.
Our use of async for the service functions may seem pointless. For now, 所有这些函数都会立即返回它们的值, without any internal use of Promises or await. 这仅仅是为将要使用的服务准备我们的代码库 async. 同样,下面,您将看到对这些函数的所有调用都使用 await.
在本文结束时,您将再次拥有一个可运行的项目来进行试验. 这将是尝试在代码库的不同位置添加各种类型错误的绝佳时机, and seeing what happens during compilation and testing. Errors in an async 特别是上下文可能不像你期望的那样. 值得深入研究 exploring various solutions, which are beyond the scope of this article.
现在,准备好DAO和服务之后,让我们回到用户控制器.
正如我们上面所说的, 控制器背后的思想是将路由配置与最终处理路由请求的代码分开. 这意味着所有的验证都应该在请求到达控制器之前完成. 控制器只需要知道如何处理实际的请求因为如果请求到达了那么远, then we know it turned out to be valid. 然后控制器将调用它将要处理的每个请求的相应服务.
在开始之前,我们需要安装一个库来安全地散列用户密码:
npm i argon2
Let’s start by creating a folder called controllers inside the users controller folder and creating a file called users.controller.ts in it:
//我们导入express,从控制器函数中为请求/响应对象添加类型
import express from 'express';

// we import our newly created user services
import usersService from '../服务/用户.service';

// we import the argon2 library for password hashing
import argon2 from 'argon2';

//我们使用debug和第1部分中描述的自定义上下文
import debug from 'debug';

Const日志:调试.IDebugger = debug('app:users-controller');
类UsersController {
    async listUsers(点播:表达.请求,res:表达.Response) {
        const users = await usersService.列表(100 0);
        res.status(200).send(users);
    }

    async getUserById(点播:表达.请求,res:表达.Response) {
        const user = await usersService.readById(req.body.id);
        res.status(200).send(user);
    }

    async createUser(点播:表达.请求,res:表达.Response) {
        req.body.密码=等待argon2.hash(req.body.password);
        const userId = await usersService.create(req.body);
        res.status(201).send({id: userId});
    }

    Async patch(点播:表达 ..请求,res:表达.Response) {
        if (req.body.password) {
            req.body.密码=等待argon2.hash(req.body.password);
        }
        日志(等待usersService.patchById(要求.body.id, req.body));
        res.status(204).send();
    }

    Async put(点播:表达.请求,res:表达.Response) {
        req.body.密码=等待argon2.hash(req.body.password);
        日志(等待usersService.putById(req.body.id, req.body));
        res.status(204).send();
    }

    async removeUser(点播:表达.请求,res:表达.Response) {
        日志(等待usersService.deleteById(要求.body.id));
        res.status(204).send();
    }
}

export default new UsersController();
Note: The lines above sending back nothing with an HTTP 204无内容 反应都是一致的 RFC 7231 on the topic.
With our user controller singleton done, 我们准备编写依赖于示例REST API对象模型和服务的另一个模块:我们的用户中间件.
What can we do with Express.js中间件? Validations are a great fit, for one. 让我们添加一些基本的验证,在请求发送到用户控制器之前充当它们的看门人:
email and password as required to create or update a useremail 字段(为了简单起见,我们使用它作为主要的面向用户的ID)To make these validations to work with Express.在js中,我们需要将它们转换成遵循Express的函数.js pattern of flow control using next(), as described 在上一篇文章中. 我们需要一份新文件 用户/中间件/用户.middleware.ts:
import express from 'express';
导入userService../服务/用户.service';
import debug from 'debug';

Const日志:调试.IDebugger = debug('app:users-controller');
类user中间件{

}

export default new UsersMiddleware();
With the familiar singleton boilerplate out of the way, 让我们将一些中间件函数添加到类体中:
async validateRequiredUserBodyFields(
    点播:表达.Request,
    res:表达.Response,
    下一个:表达.NextFunction
) {
    if (req.body && req.body.email && req.body.password) {
        next();
    } else {
        res.status(400).send({
            error: `Missing required fields email and password`,
        });
    }
}

async validateSameEmailDoesntExist(
    点播:表达.Request,
    res:表达.Response,
    下一个:表达.NextFunction
) {
    const user = await userService.getUserByEmail(要求.body.email);
    if (user) {
        res.status(400).send({ error: `User email already exists` });
    } else {
        next();
    }
}

async validateSameEmailBelongToSameUser(
    点播:表达.Request,
    res:表达.Response,
    下一个:表达.NextFunction
) {
    const user = await userService.getUserByEmail(要求.body.email);
    if (user && user.id === req.params.userId) {
        next();
    } else {
        res.status(400).send({ error: `Invalid email` });
    }
}

//这里我们需要使用一个箭头函数来正确绑定' this '
validatePatchEmail = async (
    点播:表达.Request,
    res:表达.Response,
    下一个:表达.NextFunction
) => {
    if (req.body.email) {
        log('Validating email', req.body.email);

        this.validateSameEmailBelongToSameUser(req, res, next);
    } else {
        next();
    }
};

异步validateUserExists (
    点播:表达.Request,
    res:表达.Response,
    下一个:表达.NextFunction
) {
    const user = await userService.readById(req.params.userId);
    if (user) {
        next();
    } else {
        res.status(404).send({
            错误:'用户${请求.params.userId}未找到',
        });
    }
}
为我们的API消费者提供一种简单的方法来对新添加的用户发出进一步的请求, 我们将添加一个辅助函数来提取 userId 从请求参数(来自请求URL本身)中获取,并将其添加到请求体中, where the rest of the user data resides.
这里的想法是,当我们想要更新用户信息时,能够简单地使用全身请求, 而不必担心每次都从参数中获取ID. 相反,它只在一个地方得到处理,即中间件. The function will look like this:
异步extractUserId (
    点播:表达.Request,
    res:表达.Response,
    下一个:表达.NextFunction
) {
    req.body.id = req.params.userId;
    next();
}
除了逻辑, 中间件和控制器之间的主要区别在于,现在我们使用的是 next() 函数沿已配置函数链传递控制,直到到达最终目的地, which in our case is the controller.
现在我们已经实现了项目体系结构的所有新方面,让我们回到 users.routes.config.ts file we defined 在上一篇文章中. It will call our middleware and our controllers, both of which rely on our user service, which in turn requires our user model.
The final file will be as simple as this:
import { CommonRoutesConfig } from '../共同/共同.routes.config';
import UsersController from './控制器/用户.controller';
import UsersMiddleware from './中间件/用户.middleware';
import express from 'express';

export class UsersRoutes extends CommonRoutesConfig {
    构造函数(app:表达.应用程序){
        超级(应用,“UsersRoutes”);
    }

    configureRoutes():表达.应用程序{
        this.app
            .路线(' /用户)
            .get (UsersController.listUsers)
            .post(
                UsersMiddleware.validateRequiredUserBodyFields,
                UsersMiddleware.validateSameEmailDoesntExist,
                UsersController.createUser
            );

        this.app.param(`userId`, UsersMiddleware.extractUserId);
        this.app
            .路线(/用户/:userId)
            .(UsersMiddleware.validateUserExists)
            .get (UsersController.getUserById)
            .删除(UsersController.removeUser);

        this.app.把(/用户/:userId, [
            UsersMiddleware.validateRequiredUserBodyFields,
            UsersMiddleware.validateSameEmailBelongToSameUser,
            UsersController.put,
        ]);

        this.app.补丁(/用户/:userId, [
            UsersMiddleware.validatePatchEmail,
            UsersController.patch,
        ]);

        return this.app;
    }
}
Here, 我们重新定义了路由,添加了中间件来验证业务逻辑和适当的控制器函数,以便在一切正常的情况下处理请求. 我们也用过 .param() 来自Express的函数.来提取 userId.
At the .all() function, we are passing our validateUserExists 函数 UsersMiddleware 在任何人之前被召唤 GET, PUT, PATCH, or DELETE can go through on the endpoint /用户/:userId. This means validateUserExists 不需要在我们传递给的附加函数数组中 .put() or .patch()-将在指定的函数之前被调用.
我们还以另一种方式利用了中间件固有的可重用性. By passing UsersMiddleware.validateRequiredUserBodyFields 用于两者 POST and PUT 上下文,我们优雅地将其与其他中间件功能重新组合.
免责声明:本文只涉及基本验证. 在现实世界的项目中,您需要考虑并找到编写代码所需的所有限制. 为了简单起见,我们还假设用户不能更改他们的电子邮件.
We can now compile and run our Node.js app. 一旦它开始运行,我们就可以使用REST客户端(如Postman或cURL)测试API路由了.
Let’s first try to get our users:
curl --request GET 'localhost:3000/users' \
--header 'Content-Type: application/json'
此时,我们将有一个空数组作为响应,这是准确的. 现在我们可以试着用下面的代码创建第一个用户资源:
curl --request POST 'localhost:3000/users' \
--header 'Content-Type: application/json'
注意,现在我们 Node.js app will send back an error from our middleware:
{
    "error": "Missing required fields email and password"
}
为了修复它,我们发送一个 valid 要求寄至 /users resource:
curl --request POST 'localhost:3000/users' \
--header 'Content-Type: application/json' \
——data-raw”{
    “电子邮件”:“马科斯.henrique@ngskmc-eis.net",
    "password": "sup3rS3cr3tPassw0rd!23"
}'
This time, we should see something like the following:
{
    “id”:“ksVnfnPVW”
}
This id 在您的机器上,新创建的用户和will的标识符是否不同. To make the remaining testing statements easier, 你可以用你得到的命令运行这个命令(假设你使用的是类似linux的环境):
REST_API_EXAMPLE_ID="put_your_id_here"
We can now see the response we get from making a GET request using the above variable:
curl——request GET“localhost:3000/users/$REST_API_EXAMPLE_ID”\
--header 'Content-Type: application/json'
现在,我们还可以使用以下命令更新整个资源 PUT request:
curl——request PUT "localhost:3000/users/$REST_API_EXAMPLE_ID" \
--header 'Content-Type: application/json' \
——data-raw”{
    “电子邮件”:“马科斯.henrique@ngskmc-eis.net",
    "password": "sup3rS3cr3tPassw0rd!23",
    “firstName”:“马科斯”,
    “姓”:“席尔瓦”,
    “permissionLevel”:8
}'
我们还可以通过更改电子邮件地址来测试验证是否有效, which should result in an error.
请注意,当使用 PUT 到资源ID, we, 作为API消费者, 如果我们想要符合标准的REST模式,就需要发送整个对象. That means that if we want to update just the lastName 字段,但使用我们的 PUT 端点,我们将被迫发送要更新的整个对象. It would be easier to use a PATCH 请求,因为它仍然在标准REST约束内,只能发送 lastName field:
curl——request PATCH "localhost:3000/users/$REST_API_EXAMPLE_ID" \
--header 'Content-Type: application/json' \
——data-raw”{
    “姓”:“Faraco”
}'
回想一下,在我们自己的代码库中,是我们的路由配置强制执行了这种区别 PUT and PATCH 使用本文中添加的中间件功能.
PUT, PATCH, or Both?It may sound like there’s not much reason to support PUT 考虑到 PATCH, and some APIs will take that approach. Others may insist on supporting PUT 使API“完全符合rest”,在这种情况下,按字段创建 PUT 对于常见的用例,路由可能是一种合适的策略.
实际上,这些观点是更大范围讨论的一部分,范围从 real-life differences between the two to 更灵活的语义 for PATCH alone. We present PUT support here and widely-used PATCH 简单的语义, 但是鼓励读者在他们觉得准备好了的时候深入研究.
像上面那样再次获取用户列表,我们应该看到已创建的用户及其字段已更新:
[
    {
        “id”:“ksVnfnPVW”,
        “电子邮件”:“马科斯.henrique@ngskmc-eis.net",
        "password": "$argon2i$v=19$m=4096,t=3,p = 1 ZWXdiTgb922OvkNAdh9acA XUXsOHaRN4uVg5ltIwwO美元+ SPLxvb9uhOKcxoLER1e /毫米”,
        “firstName”:“马科斯”,
        “姓”:“Faraco”,
        “permissionLevel”:8
    }
]
Finally, we can test deleting the user with this:
curl——request DELETE“localhost:3000/users/$REST_API_EXAMPLE_ID”\
--header 'Content-Type: application/json'
再次获取用户列表,我们应该看到已删除的用户不再存在.
With that, we have all the CRUD operations for the users 资源工作.
在本系列的这一部分中,我们进一步探讨了使用Express构建REST API的关键步骤.js. 我们将代码拆分为支持服务、中间件、控制器和模型. Each of their functions has a specific role, 无论是验证, 逻辑运算, or processing valid requests and responding to them.
我们还创建了一种非常简单的存储数据的方法,使用(请原谅双关语) express purpose of allowing some testing at this point, 然后在本系列的下一部分中被更实用的东西所取代.
除了用单例类构建一个简单的API之外, 例如,有几个步骤可以使它更容易维护, 更加可伸缩, and secure. In the last article in the series, we cover:
You can browse the final code from this article here.
It depends. In the context of an Express.js back end, 中间件只是内部架构中用于实现API的一种组件. 然而,在较大的(e.g.有时api本身可以被认为是“中间件”.”
在构建API时, 中间件将帮助在到达控制器之前验证请求中的任何需求, 同时保持代码的组织性和易于维护.
Express.Js中间件函数可以操作请求,也可以结束请求-响应生命周期. 当多个路由需要相同的验证或操作时, middleware can be reused among them, making it easier to maintain and extend the codebase.
Express.Js中间件函数接收请求和响应对象以及“next”函数. 它们可能会修改请求或使用响应对象来缩短请求-响应生命周期(例如.g.,发送错误400.)“next”函数调用下一个中间件,将它们链接在一起.
Express.js REST API控制器可以定义为接收请求和响应对象的最后一个函数, 目的是在向请求者发送响应之前处理请求.
Yes, REST API可以被视为web服务,因为REST的底层协议是HTTP, 哪一种技术允许通过网络进行机器对机器的交互.
数据传输对象(DTO)是一种设计模式,用于定义两个不同的应用程序在不一定处于相同环境中时相互传输数据的方式.
Marcos has 17+ years in IT and development. 他的爱好包括REST架构、敏捷开发方法和JS.
 作者都是各自领域经过审查的专家,并撰写他们有经验的主题. 我们所有的内容都经过同行评审,并由同一领域的Toptal专家验证.
12
World-class articles, delivered weekly.
World-class articles, delivered weekly.
